The Honeywell TH8320R1003 is a VisionPRO 8000 Series thermostat, designed for precise temperature control and energy efficiency. It features a user-friendly touch-screen interface, remote access, and smart home integration.
With advanced scheduling and adaptive recovery technology, this thermostat optimizes heating and cooling systems for comfort and energy savings. Its compatibility with various HVAC systems makes it versatile for different home setups.
Installation is straightforward, with options for wired or battery power, and it supports RedLINK accessories for enhanced functionality. The TH8320R1003 is a reliable choice for modern, efficient temperature management.
1.1 Overview of the Honeywell TH8320R1003
The Honeywell TH8320R1003 is a VisionPRO 8000 Series touchscreen programmable thermostat designed for precise temperature control. It features a backlit display, adaptive Intelligent Recovery technology, and compatibility with various HVAC systems, including heat pumps and dual-fuel setups. The thermostat supports both wired (C-wire) and battery-powered options, ensuring flexibility in installation. Its user-friendly interface allows for easy scheduling and adjustments, while RedLINK technology enables wireless connectivity for enhanced functionality. This thermostat is ideal for homeowners seeking energy efficiency and advanced temperature management capabilities.
1.2 Key Features and Benefits
The Honeywell TH8320R1003 offers a 7-day programmable schedule, energy-saving features, and compatibility with smart home systems. Its large, backlit touchscreen ensures easy navigation, even in low light. The thermostat supports both C-wire and battery power, providing installation flexibility. Advanced features include remote access via Wi-Fi, adaptive recovery to learn heating/cooling patterns, and system alerts for maintenance. It also offers precise temperature control within one degree, enhancing comfort and energy efficiency. These features make it a versatile and efficient choice for modern homes.
System Compatibility
The Honeywell TH8320R1003 is compatible with heat pumps, gas furnaces, and dual-fuel systems. It supports RedLINK accessories and integrates with smart home systems, ensuring versatility for various HVAC setups.
2.1 Heating and Cooling Systems Compatibility
The Honeywell TH8320R1003 is designed to work seamlessly with a variety of heating and cooling systems, including traditional gas furnaces, electric systems, and heat pumps. Its compatibility extends to dual-fuel setups, allowing for efficient operation in different climates. The thermostat supports both single-stage and multi-stage systems, offering precise control for optimal performance. This versatility ensures that it can be integrated into most home configurations, providing consistent comfort and energy efficiency.
2.2 Heat Pump and Dual-Fuel System Compatibility
The Honeywell TH8320R1003 is fully compatible with heat pumps and dual-fuel systems, offering precise control for efficient operation. It supports systems with gas backup heat, allowing seamless transitions between heat pump and propane or electric heating. The thermostat enables customization of outdoor temperature thresholds, such as switching to backup heat below 25°F. Advanced settings ensure optimal performance in dual-fuel configurations, while its adaptive technology minimizes energy use. This compatibility makes it ideal for homes requiring flexible heating solutions.
Tools and Materials Required
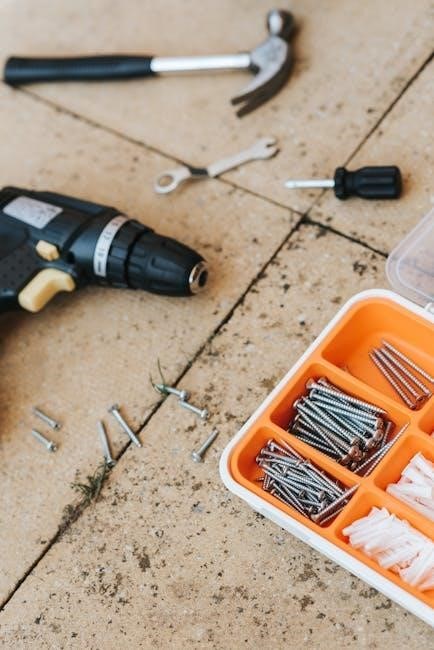
For installing the Honeywell TH8320R1003, you’ll need basic tools like a screwdriver, wire strippers, and a drill. Materials include mounting screws, wall anchors, and potentially a C-wire adapter. Ensure all necessary components are available before starting the installation process for a smooth setup.
3.1 Tools Needed for Installation
To install the Honeywell TH8320R1003 thermostat, you will need a screwdriver for removing the old thermostat and mounting the new one. Wire strippers may be necessary for preparing wires, and a drill could be required for wall anchors. Additional tools include a level to ensure proper alignment and a voltage tester for safety. Having these tools ready will streamline the installation process and ensure a secure, professional-looking setup. Proper preparation is key to avoiding delays or complications during the installation.
3.2 Materials Required
For installing the Honeywell TH8320R1003 thermostat, you will need wall anchors and screws for mounting. If using a C-wire, ensure it is available or install a C-wire adapter. Batteries (AA alkaline) are required if not using a C-wire. Wire connectors and a wire stripper may be necessary for wiring. Additionally, a C-wire adapter is recommended if your system lacks one. These materials ensure a secure and proper installation, allowing the thermostat to function efficiently with your HVAC system.

Installation Guide
The Honeywell TH8320R1003 installation involves preparing the site, removing the old thermostat, and mounting the new one. Ensure proper wiring and follow the manual for optimal functionality.
4.1 Preparing the Site
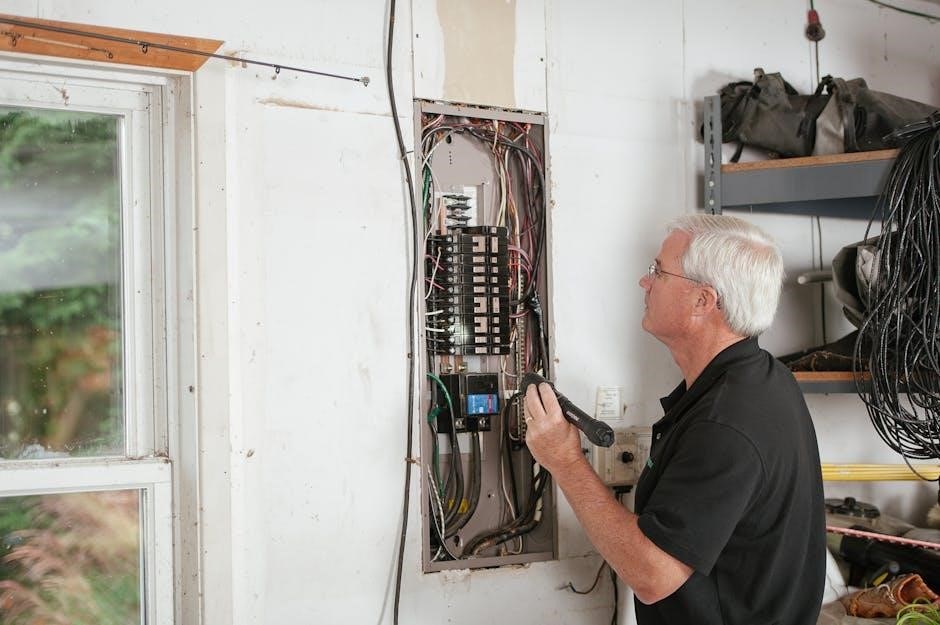
Before installation, turn off the HVAC system at the circuit breaker to ensure safety. Verify the power is off using a voltage tester. Remove the old thermostat and clean the wall area to ensure a smooth mounting process. Gather all necessary tools and materials, such as screwdrivers, a drill, and wall anchors. Refer to the wiring diagram to understand the connections. Handle wires carefully to avoid damage. Ensure the site is clear of debris and obstacles for proper installation. Follow the manual’s safety guidelines to avoid electrical hazards. This preparation ensures a safe and efficient installation process.
4.2 Removing the Old Thermostat
Start by switching off the HVAC system at the circuit breaker and verifying the power is off using a voltage tester. Remove the screws holding the old thermostat in place and gently pull it away from the wall. Carefully disconnect the wires from the old thermostat, labeling them for reference. Avoid touching any wires to prevent electrical shock. Remove any debris or old adhesive from the wall and discard the old thermostat responsibly. This step ensures a clean and safe surface for the new installation.
4.3 Mounting the New Thermostat
Mount the new thermostat by first attaching the wallplate to the wall using the provided screws. Ensure the plate is level and aligned properly for secure installation. Gently snap the thermostat onto the wallplate until it clicks securely into place. Tighten any additional screws to hold the device firmly. Double-check that the thermostat is level and the display is responsive. This step ensures a stable and proper installation, ready for wiring and setup.
Wiring Instructions
Refer to the wiring diagram in the manual for terminal designations. Connect wires to the appropriate terminals, ensuring correct pairing for heating, cooling, and power. Turn on 24VAC power and verify connections for proper operation. Always follow safety guidelines and consult the manual for detailed wiring instructions.
5.1 Understanding the Wiring Diagram
The wiring diagram in the Honeywell TH8320R1003 manual provides a clear visual guide for connecting the thermostat to your HVAC system. It outlines the terminal designations and their functions, such as R (24VAC power), W (heating), Y (cooling), and C (common). Properly matching wires to these terminals ensures correct system operation. The diagram also highlights optional connections for RedLINK accessories and smart home integrations. Always refer to this diagram to avoid installation errors and ensure safe wiring practices.
5.2 Connecting the Wires
When connecting the wires for the Honeywell TH8320R1003 thermostat, start by referring to the wiring diagram in the manual. Identify the terminals: R (24VAC power), W (heating), Y (cooling), and C (common). Match each wire to the correct terminal to ensure proper system operation. If using a C wire, it provides constant power for advanced features like RedLINK accessories. For battery-powered setups, no wiring is needed, but ensure batteries are correctly installed. After connecting, turn on the 24VAC power and test the system to confirm heating, cooling, and fan functions work. Always prioritize electrical safety by turning off power at the circuit breaker before starting. If issues arise, consult the manual or online troubleshooting guides for solutions.
5.3 Testing the Wiring
After connecting the wires, turn on the 24VAC power at the circuit breaker. Test each function: heating, cooling, and fan operations. Ensure the thermostat responds correctly to input. If no power or incorrect operation occurs, check wire connections for accuracy. Verify that all terminals match the wiring diagram. If issues persist, consult the manual or online troubleshooting guides for solutions. Proper testing ensures safe and efficient system operation, preventing electrical hazards and ensuring optimal performance of the Honeywell TH8320R1003 thermostat.
Power Options
The Honeywell TH8320R1003 offers flexible power options, including a C-wire connection for consistent power or battery operation. This ensures reliable functionality without wiring hassles, providing versatility for different setups.
6.1 Using a C-Wire
The Honeywell TH8320R1003 can be powered using a C-wire, providing a consistent 24VAC power supply. This eliminates the need for batteries and ensures uninterrupted operation. To connect, identify the C-wire terminal on your HVAC system and link it to the thermostat’s corresponding terminal. Refer to the wiring diagram in the manual for precise instructions. A C-wire is essential for enabling advanced features like RedLINK accessories. If your system lacks a C-wire, consider using a Wire Saver or checking compatibility with battery-only operation.
6.2 Battery-Powered Option
The Honeywell TH8320R1003 can operate using AA alkaline batteries, eliminating the need for a C-wire. Batteries typically last 12-18 months under normal use. A low-battery indicator alerts you when replacement is needed. This option is ideal for systems without a C-wire, offering installation flexibility. However, some advanced features like RedLINK accessories may require a C-wire. Always use high-quality batteries to ensure reliable performance and maintain optimal thermostat functionality.
Initial Setup and Configuration
Begin by setting your preferred language and temperature units (Celsius or Fahrenheit) for ease of use. Connect the thermostat to your Wi-Fi network for remote access and updates.
7.1 Setting the Language and Units
To set the language, press and hold the MENU button until the menu appears. Use the arrow buttons to navigate to the Language option and select your preferred language. For temperature units, go to the Preferences menu, then choose between Celsius or Fahrenheit. Save your settings to ensure the thermostat displays the correct units. This feature ensures the thermostat is user-friendly and adaptable to your regional preferences. Proper unit setup is essential for accurate temperature control and display.
7.2 Connecting to Wi-Fi
To connect the Honeywell TH8320R1003 to Wi-Fi, navigate to the menu by pressing the MENU button. Select “Network Settings” and choose your home network from the list. If your network doesn’t appear, manually enter the SSID. Enter your Wi-Fi password using the on-screen keyboard. Once connected, the thermostat will confirm the connection. Ensure the connection is successful by checking the network status in the menu. This allows remote access and smart home integration features to function properly.
7.3 Setting Up the Schedule
Press the Schedule button on the thermostat to begin setting your preferred temperature plan. Use the arrow buttons to select the day and time period you wish to program. Input your desired temperature for that specific time frame. Repeat this process for all days and periods as needed. Once completed, save your schedule to ensure it becomes active. The thermostat will automatically adjust temperatures according to your settings, optimizing comfort and energy efficiency throughout the day.
Programming the Thermostat
The Honeywell TH8320R1003 allows you to create a daily schedule, adjust temperature settings, and override the schedule as needed for flexibility and convenience.
8.1 Creating a Daily Schedule
Creating a daily schedule on the Honeywell TH8320R1003 is straightforward. Press the Schedule button, then use the arrow keys to select the desired day and time period. Input your preferred temperature for that time frame and repeat for other periods. The thermostat allows you to set different temperatures for multiple time slots in a day. Save your settings to activate the schedule. This feature ensures consistent comfort and energy efficiency. You can also program the schedule via the touch-screen interface or through the remote access app for added convenience.
8.2 Adjusting Temperature Settings
The Honeywell TH8320R1003 allows for easy temperature adjustments using the up and down arrow buttons. Press the arrows to increase or decrease the set temperature. The Hold button overrides the schedule temporarily, maintaining the current temperature until the next scheduled period. For fan control, press the Fan button to toggle between Auto (fan runs with HVAC) and On (continuous fan operation). Additionally, you can switch between Celsius and Fahrenheit by pressing and holding the System and Fan buttons to access the setup menu and adjust preferences.
8.3 Overriding the Schedule
To override the programmed schedule, press the Hold button on the Honeywell TH8320R1003 thermostat. This allows temporary manual temperature adjustments without affecting the programmed schedule. The thermostat will maintain the new temperature until the next scheduled period begins. Use the up or down arrows to adjust the temperature during the override. This feature is ideal for occasional changes without altering the entire schedule. The system will automatically revert to the programmed settings at the next scheduled time, ensuring uninterrupted energy management.
Advanced Features
The Honeywell TH8320R1003 offers remote access via Wi-Fi, smart home integration, and energy reports to optimize comfort and savings. Its advanced features enhance functionality and convenience.
9.1 Remote Access and Control
The Honeywell TH8320R1003 allows users to control their thermostat remotely through smartphones or tablets using Wi-Fi connectivity. This feature enables scheduling adjustments, temperature monitoring, and system overrides from anywhere. Remote access ensures convenience, allowing homeowners to manage their comfort settings even when away. The thermostat’s compatibility with Honeywell Home apps provides seamless integration, making it easy to maintain optimal temperatures without physical interaction. This enhances flexibility and energy efficiency, catering to modern smart home preferences.
9.2 Smart Home Integration
The Honeywell TH8320R1003 seamlessly integrates with popular smart home systems, including Amazon Alexa and Google Home. This compatibility allows users to control the thermostat using voice commands or through smart home apps. Integration enables the creation of custom routines and scenes, enhancing home automation. The thermostat can also work with other smart devices to optimize energy usage and comfort. By connecting to a smart home ecosystem, users gain greater control over their environment, simplifying daily operations and improving efficiency.
9.3 Energy Reports and Savings
The Honeywell TH8320R1003 provides detailed energy reports, offering insights into usage patterns and savings opportunities. Users can view historical data to track energy consumption and identify efficiency improvements. The thermostat also features energy-saving modes and smart recovery, which optimizes heating and cooling cycles to reduce waste. With customizable reports and alerts, homeowners can make informed decisions to lower utility bills while maintaining comfort. This feature ensures the system operates efficiently, promoting long-term energy savings and environmental benefits.
Troubleshooting Common Issues
Common issues include display not turning on, heating/cooling not starting, or connectivity problems. Check power sources, wiring connections, and Wi-Fi settings. Refer to the manual for detailed solutions.
10.1 Connectivity Problems
Connectivity issues with the Honeywell TH8320R1003 often arise from Wi-Fi network disruptions or incorrect settings. Ensure the thermostat is connected to the correct network and that the password is entered accurately. Restarting the router and thermostat can resolve temporary glitches. If problems persist, check for firmware updates or reset the thermostat to factory settings, then reconnect. Refer to the manual for detailed troubleshooting steps.
10.2 System Malfunctions
System malfunctions with the Honeywell TH8320R1003 may include issues like the heater not turning off or the system failing to switch between heat and cool modes. Check if the thermostat is properly connected to the HVAC system and ensure all wires are securely attached. Verify that the system settings match your equipment type, such as heat pump or dual-fuel configurations. Restarting the thermostat or resetting it to factory settings can often resolve these issues. If problems persist, consult the manual or contact a professional for assistance.
10.3 Battery and Power Issues
Battery and power issues with the Honeywell TH8320R1003 can occur if the batteries are dead or improperly installed. Ensure the batteries are correctly placed and fully charged. If using a C-wire, verify it is properly connected to maintain consistent power. If the thermostat loses connectivity after battery replacement, restart it and re-establish the connection through the menu. For prolonged power outages, check the system’s backup capabilities. Regularly inspect the batteries and wiring to prevent power-related malfunctions and ensure reliable operation.
Maintenance and Care
Regularly clean the thermostat’s screen and ensure proper battery replacement. Update software periodically for optimal performance and security. Check wiring connections to prevent malfunctions.
11.1 Cleaning the Thermostat
Cleaning the Honeywell TH8320R1003 thermostat is essential for maintaining its functionality. Use a soft, dry cloth to gently wipe the screen and remove dust or smudges. Avoid harsh chemicals or abrasive materials that could damage the display.
For tougher stains, slightly dampen the cloth with water, but ensure no moisture seeps inside. Regular cleaning prevents dirt buildup, ensuring accurate temperature readings and smooth operation. Power down the thermostat before cleaning to avoid any electrical issues.
11.2 Replacing Batteries
To replace the batteries in your Honeywell TH8320R1003 thermostat, first power it down to prevent electrical issues. Remove the thermostat from the wall by taking out the mounting screws. Locate the battery compartment on the back, open it, and remove the old batteries. Insert the new ones, ensuring correct polarity. Close the compartment, remount the thermostat, and restore power. Check if any settings need to be reset and ensure all functions work properly. Clean the terminals with a soft cloth if necessary to maintain good connectivity.
11.3 Updating Software
To update the Honeywell TH8320R1003 thermostat’s software, ensure it is connected to Wi-Fi. Go to the menu, select “Settings,” and choose “Software Update.” If an update is available, follow the on-screen instructions to download and install it. Once installed, restart the thermostat to apply changes. For manual updates, download the latest software from Honeywell’s website to a USB drive and upload it via the thermostat’s USB port. Always refer to the installation manual for detailed instructions. Ensure the thermostat is fully updated for optimal performance.
Safety Considerations
Always disconnect power before installation. Follow manufacturer guidelines to avoid electrical hazards. Ensure proper installation to prevent system malfunctions. Keep the thermostat away from extreme temperatures and physical stress.
12.1 Electrical Safety
Always disconnect the power supply before installing or servicing the thermostat. Verify the power is off using a voltage tester. Avoid electrical hazards by following proper wiring procedures. Ensure all connections are secure and meet local electrical codes. Do not expose the thermostat to water or direct sunlight. Ground the system correctly to prevent electrical shocks. Use compatible wires and keep the area dry during installation. Adhere to safety guidelines to avoid malfunctions or fire risks. If unsure, consult a licensed electrician.
12.2 System Safety Features
The Honeywell TH8320R1003 incorporates multiple system safety features to ensure reliable operation. It includes overheat protection to prevent excessive temperatures and sensors that detect system anomalies, triggering shutdowns if necessary. The thermostat also supports emergency heat activation during extreme cold snaps, enhancing safety. By continuously monitoring the HVAC system’s performance, it helps prevent malfunctions and ensures safe, efficient operation. These features work together to maintain a secure and comfortable environment while minimizing potential risks associated with heating and cooling systems.
The Honeywell TH8320R1003 thermostat stands out as a reliable, efficient, and user-friendly solution for temperature control. Its advanced features, ease of installation, and compatibility with various HVAC systems make it a top choice for modern homes. By offering precise control, energy savings, and smart home integration, this thermostat ensures comfort and convenience. Whether you prioritize simplicity or advanced functionality, the TH8320R1003 delivers a seamless experience, making it an excellent investment for any household seeking optimal climate management.